
Baked apples with maple syrup and cinnamon are finished with a maple-walnut sauce made from the sweet apple juices left in the pan. The apples stay tender enough to eat with a spoon, while toasted walnuts and lemon keep the sauce from feeling like too much.
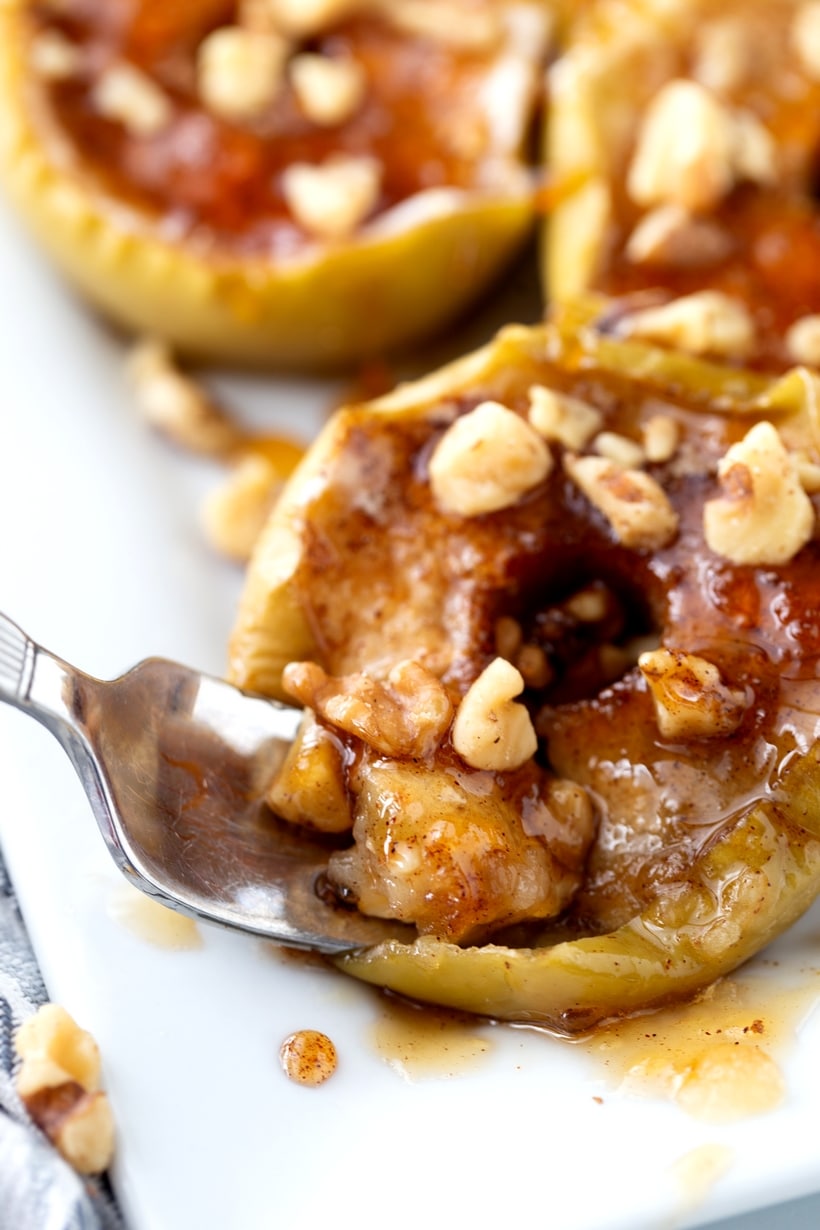
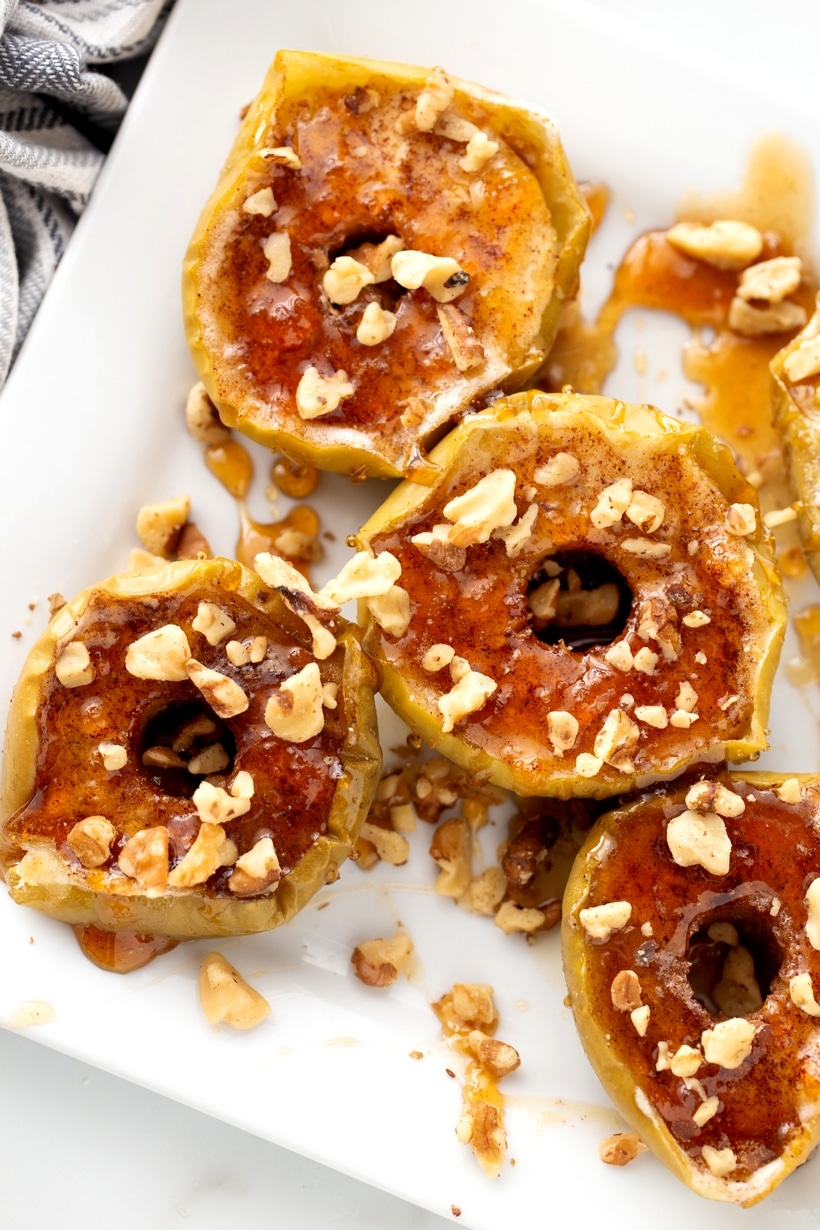
Maple Baked Apples with Cinnamon, Maple Sauce and Toasted Walnuts
I have two Granny Smith apple trees, and when those apples start coming off them, they don’t show up in any reasonable quantity. They come in like I’ve somehow agreed to operate a small commercial orchard without being asked. I don’t mind it, though. These baked apples are one of the first things I make because I can use several at once without peeling a single one.
I cut the apples in half, core them and bake them with cinnamon, brown sugar and maple syrup, which is about as uncomplicated as I can make an apple dessert. There is no filling to mix, nothing to stuff back into the middle and especially no peeling, which becomes increasingly important when every flat surface in the kitchen seems to have apples on it.
The maple syrup is where I think the recipe gets better than its level of effort would suggest. As the apples bake, their juices run into the syrup in the bottom of the dish, along with some of the cinnamon and brown sugar. I pour all of that into a saucepan afterward and reduce it into the maple-walnut sauce that goes back over the apples.
I finish the sauce with lemon and toasted walnuts, then spoon it over the warm apples while they’re still soft enough to eat with a spoon. It’s simple, but it doesn’t feel like I gave up and baked some fruit because I had too many apples.
I’ve been making these for years, but having my own Granny Smith trees has made me appreciate them differently. When I’m standing in front of another counter full of apples, cutting four of them in half and putting them in the oven feels so much more realistic than deciding I’m about to peel thirty.

The Decisions Behind This Recipe
- The part I care about most is the maple syrup in the baking dish. It’s not there only to sweeten the apples. As they bake, the fruit releases its juices into the syrup, and I spoon that liquid back over the cut sides so it picks up the cinnamon and brown sugar along the way. Once the apples are tender, that same liquid becomes the sauce. Life cycle complete.
- I use a full cup of maple syrup because I need enough in the dish to cook with the apples and still have something left to reduce afterward. Apples don’t release the same amount of juice every time, so I don’t give the sauce a rigid reduction time. I cook it until it looks like something I want to spoon over the apples.
- Cutting the apples in half across the middle gives the cinnamon and brown sugar a lot more exposed fruit to work with, and it gets them tender much faster than baking them whole. It also means I can get through a decent number of apples without peeling anything or hollowing out eight little cavities.
- The lemon goes in twice for two different reasons. I use some on the cut apples before baking, then add more to the finished sauce after it has reduced. That second addition is important once the maple syrup and apple juices have concentrated.
- I keep the walnuts out of the baking dish and toast them separately. They go into the sauce at the end so they still taste like toasted walnuts instead of spending half an hour getting soft in maple syrup.

Ingredients
- Granny Smith apples – Their tartness is what I want with maple syrup and brown sugar, and they soften nicely without turning to mush. I use large apples from my own trees when they’re producing, but similarly sized Granny Smiths from the grocery store work just the same.
- Fresh lemon juice – Some goes over the cut apples before baking, and the rest goes into the maple sauce at the end. That last little bit is important once the maple syrup and apple juices have reduced and gotten sweeter.
- Light Brown sugar – I sprinkle it directly over the cut side of the apples so it melts into the fruit with the cinnamon as they bake. If you’re out, make a simple batch of my homemade brown sugar.
- Ground cinnamon – This goes on the apples, not in the maple syrup. Some will naturally work its way into the baking liquid as you baste, but I want most of it on the fruit.
- Pure maple syrup – Use real maple syrup, not pancake syrup. It does a lot more than sweeten the apples because the baking liquid eventually becomes the sauce.
- Table salt – Enough goes into the finished sauce to keep the maple and brown sugar from becoming too much.
- Walnuts – Toast them first and add them at the end so they keep their flavor and texture. Pecans would also be a very substitute.

How to Make Baked Apples with Maple-Walnut Sauce
Find the complete printable recipe with measurements in the recipe card at the BOTTOM OF THE POST.
- Step One (get the apples ready)
Preheat the oven to 400°F. Cut the apples in half crosswise and remove the cores, then brush the cut sides with 1 teaspoon of the lemon juice and arrange them cut-side up in a baking dish. - Step Two (add the cinnamon sugar and maple syrup)
Stir the brown sugar and cinnamon together and sprinkle the mixture over the exposed apple flesh. Pour the maple syrup into the bottom of the baking dish around the apples. As they bake, their juices will run into the syrup and start making the liquid you’ll use for the sauce later. - Step Three (bake until tender)
Cover the dish with foil and bake for 10 minutes. Remove the foil and bake for about 15 minutes more, spooning some of the maple liquid over the apples as they cook. Start checking them with a paring knife near the end. You want the knife to slide in easily, but the apples should still be firm enough to move to a platter without falling apart. Larger apples may need a few extra minutes. - Step Four (make the maple sauce)
Transfer the apples to a serving platter, then pour every bit of the maple syrup and apple juices from the baking dish into a small saucepan. Add the remaining lemon juice and salt, bring it to a boil and cook for 3 to 5 minutes, stirring often, until it has reduced and thickened slightly. Apples give off different amounts of juice, so I pay more attention to how the sauce looks than to the exact number of minutes. - Step Five (add the walnuts)
Take the saucepan off the heat and stir in the toasted walnuts. Spoon the warm maple-walnut sauce over the apples, making sure some stays on top and plenty ends up around them for serving. - Step Six (serve them warm)
Serve the apples while they’re warm, either as they are or with vanilla ice cream or whipped cream. If there is extra sauce in the pan, this isn’t the moment to be stingy with it.

Recipe Tips
- Try to use apples that are close in size so they finish baking around the same time. Mine come straight from the trees and don’t seem to have any interest in uniformity, so I expect the larger halves to need a few extra minutes.
- When you core the apples, remove the seeds and firm center without carving out half the fruit. A melon baller, apple corer or small paring knife will all get this done. These aren’t stuffed apples, so you don’t need a giant cavity in the middle.
- Remember that the sauce will continue to thicken as it cools. If you take it too far on the stove, you can end up with something much thicker than you meant to make. I’ve done it.
- Now that you’ve opened the maple syrup and still have more than half a bottle left, use it in my maple butternut squash and apple soup or my crispy maple mustard-glazed chicken cutlets.

Storage and Reheating
- Store leftover baked apples and maple-walnut sauce in an airtight container in the refrigerator for up to 4 days. You can store them together, although I like keeping extra sauce separately because it makes reheating easier.
- The sauce will get much thicker in the refrigerator. That’s normal. Warm it before deciding it needs anything added to it.
- For one serving, microwave an apple half with some sauce in short intervals until warm. For several servings, place the apples in a covered baking dish in a 325°F oven until heated through, then warm the sauce separately and spoon it over the apples.
- You can make these earlier in the day and reheat them before dessert, although I like them best the day they’re made. I wouldn’t freeze them. Cooked apples can get much softer after freezing and thawing, and there’s nothing to be gained from doing that to a perfectly good baked apple.

FAQs
- What are the best apples for baked apples with maple syrup?
Granny Smith are my first choice because their tartness goes well with maple syrup and brown sugar. Gala apples are also fine, but the finished dessert will be sweeter and they may soften faster, so start checking them a little earlier. - Can I use pancake syrup instead of pure maple syrup?
No. The syrup becomes the base of the finished sauce, so its flavor is more important than it would be if you were only drizzling it over the top. - Do I need to peel the apples?
No. Leave the peels on. Halving and coring them is all the prep they need before baking. - Can I make these ahead of time?
Yes. Bake the apples and make the sauce earlier in the day, refrigerate them once cooled, then reheat before serving. I wouldn’t make them several days ahead specifically for an occasion. - Can I leave out the walnuts?
Yes. The sauce will still reduce normally without them. - Can I use pecans instead?
Yes. Toast them first and stir them in after the sauce comes off the heat. - Can I use dark brown sugar instead of light brown sugar?
Yes. Dark brown sugar will give you more molasses flavor, but either one is fine.
From My Kitchen Notes

When You Have More Apples Than Plans
- Fresh Apple Bars – Granny Smith apples, golden raisins, walnuts
- Crockpot Apple Crisp – Tender apples, crisp oat topping, slow cooker
- Brown Sugar Cinnamon Apple Bundt Cake – Fresh apples, brown sugar swirl, cinnamon
- Apple Cheesecake Bars – Caramel apples, cheesecake, brown sugar shortbread
- Upside Down Apple Pie – Apples, brown sugar, butter, pecans
This post may contain affiliate links. Please read my disclosure policy.

Baked Apples with Maple-Walnut Sauce
Equipment
- baking dish 9x13 (23x33 cm) Large enough to arrange all eight apple halves in a single layer.
- measuring cups and spoons For measuring the maple syrup, brown sugar, cinnamon, lemon juice and salt.
- apple corer or small pairing knife. For removing the cores from the apple halves.
- mixing bowls (small) For mixing the brown sugar and cinnamon.
- pastry brush For brushing lemon juice over the cut apples.
- Saucepan (small) For reducing the maple syrup and apple cooking juices into the sauce.
- aluminum foil For covering the apples during the first part of baking.
Ingredients
- 4 large Granny Smith apples halved crosswise and cored
- 2 tsps (10 ml) fresh lemon juice divided
- 2 tbsps (25 g) packed light brown sugar (dark works too)
- ¼ tsp (0.5 g) ground cinnamon
- 1 cup (315 g) maple syrup (not pancake syrup)
- ⅛ tsp (0.75 g) table salt
- ½ cup (60 g) chopped walnuts toasted
Toppings:
- vanilla ice cream (optional)
- whipped cream (optional)
Instructions
- Preheat oven to 400°F (204°C).
- Brush the cut sides of the apples with 1 teaspoon lemon juice. Arrange the apples cut-side up in a baking dish.4 large Granny Smith apples , 2 tsps (10 ml) fresh lemon juice
- Stir together the brown sugar and cinnamon in a small bowl, then sprinkle the mixture evenly over the cut sides of the apples. Pour the maple syrup into the bottom of the baking dish around the apples.2 tbsps (25 g) packed light brown sugar, ¼ tsp (0.5 g) ground cinnamon, 1 cup (315 g) maple syrup
- Cover the baking dish with foil and bake for 10 minutes. Remove the foil and continue baking for about 15 minutes, spooning some of the maple cooking liquid over the apples as they bake. The apples are ready when a paring knife slides easily into the flesh but the halves are still firm enough to transfer to a serving platter without breaking apart. Larger apples may require additional baking time.
- Transfer the baked apples to a serving platter. Carefully pour all of the maple syrup and apple juices from the baking dish into a small saucepan.
- Add the remaining 1 teaspoon lemon juice and the salt to the saucepan and bring the mixture to a boil. Cook for 3 to 5 minutes, stirring frequently, until the maple-apple sauce has reduced and is slightly thicker. The amount of liquid released by the apples can vary, so use the consistency of the sauce as your guide instead of relying only on the cooking time.⅛ tsp (0.75 g) table salt
- Remove the sauce from the heat and stir in the toasted walnuts. Spoon the warm maple-walnut sauce over the baked apples.½ cup (60 g) chopped walnuts
- Serve warm, with vanilla ice cream or whipped cream if desired.vanilla ice cream, whipped cream
Video
Notes
- To toast the walnuts, spread them in a dry skillet over medium heat and cook for 3 to 5 minutes, stirring frequently, until fragrant and lightly toasted. Watch them closely toward the end because walnuts can go from toasted to burned quickly.
- The baking time will vary depending on the size of the apples. Use a paring knife to check them instead of relying entirely on the clock, adding a few additional minutes if necessary.
- Use pure maple syrup for this recipe, not pancake syrup. Because the maple syrup becomes the base of the finished sauce after baking, the flavor and composition of the syrup make a noticeable difference.
- The apples release juice as they bake, and the amount can vary from one batch to another. If you end up with more cooking liquid, the sauce may need a little longer than 3 to 5 minutes to reduce to the right consistency.
- Toast the walnuts before adding them to the finished sauce. Adding them after the sauce has reduced keeps them out of the wet baking dish and preserves more of their toasted flavor and texture.
- One large apple makes two servings. Vanilla ice cream and whipped cream are optional and are not included in the nutrition estimate.
Nutrition
Have you made these Baked Apples with Maple-Walnut Sauce? I’d love to hear how they turned out – leave a comment below and let me know.
As an Amazon Associate and member of other affiliate programs, I earn from qualifying purchases.
Lena in VT says
Oh my goodness those are beautiful.
Donna says
Ive missed reading your blog while Ive been on ‘hiatus’.
Jennifer says
What do you do with all this food you cook?! You’re too skinny to be eating yourself!
Liz C. says
I’m going to file this one under New Mexico apple season. I love to drive over the state line and buy them by the bushel. 😉
Fallon says
I love a good baked apple and this looks like a good baked apple!
Angie says
A question: Why the lemon juice? I know that it is commonly used to prevent apples from oxidizing and turning brown, but as these are going to be smothered and baked anyway, the brownness doesn’t matter.
Not that it’s a big deal, but I wonder how much it would impact the taste.
5 Star Foodie says
These baked apples were fantastic with this maple-walnut sauce!
Debbi says
My entire family drooled over this for quite awhile. It looks fantastic! Apple pie without the crust, awesome!
Miss Meat and Potatoes says
I believe you. I’m in love. In fact I’m so intrigued with these they make me wish it was fall which makes me feel sacrilegious (I don’t really wish it was fall – hello summer!) Thanks for another great one.
Culinary Cory says
The simplicity of this dish really captured my attention. It would make a great dessert of a weeknight dinner party.
June says
Imagine this with homemade cinnamon ice cream? On the other hand it looks like it needs nothing else – YUM.
Dirk in Maine says
Oh these look amazing, going to make them tonight for a small gathering served with vanilla ice cream.
grace says
undeniable fact: I funneled that sauce right down my gullet. amazing, cathy. amazing.
Paula says
Oh my, those are lovely! And, since they are gluten free, they make a great dessert in lieu of pie! Quick question: When did you add the nuts? To the maple sauce? Or did you just sprinkle them on and pour the sauce over everything? Totally yummy!
Julie says
That sauce was just scrumptious!
Jenn's Menu and Lifestyle Blog says
I love the way the apples look with cinnamon on top, before they were baked. I bet they smelled incredible!
Jenn
HoneyB says
Yum! A nice low-fat dessert….and I love maple syrup (have 2 new gallon’s!). Will have to make this one!
Dominic says
I love the combination of maple syrup with walnuts. Yum.
Paula says
Paula-
I sprinkled the nuts on top after baking and then poured the sauce over them.
dawn says
Made these last night…OMG incredible…just like apple pie and no fuss like you said!
Daily Spud says
Oh wow, so simple yet sounds soooo good – apple desserts are my absolute favourite. This is getting bookmarked for when my mother’s apples are ripe – they make the best baked apples ever!
The Teacher Cooks says
Your baked apples look delicious. I am saving this recipe for my classes next year. It would be great for teens that tend to leave out fruits.
Marjie says
I usually quarter my apples and take out the core, and follow pretty much the same recipe as you, although sometimes I brush the apple slices with melted butter first. They are heavenly!
Rachel SdOC says
You hit it on the head when you said apple pie without the fuss. I was thinking this is perfect for when you want some apple pie and don’t feel like making the effort.
Pam says
They look amazing! Actually, so do your fried pickles down below. YUM.
lisaiscooking says
The sauce and crunchy walnuts were amazing on top. I bet a scoop of vanilla ice cream would be pretty fantastic with one of these!
tom tall clover farm says
This recipe must be from your healthy-eating category. 😉
pigpigscorner says
What a great way to enjoy apples! Love the sauce!
Kayola says
Making these tonight………..they look de-lish and I swear I can totally smell the aroma….my imagination is good…..and I imagine they are pretty dang tasty!!!!!
Helen says
With Winter fast approaching here this one is certainly going into the recipe book.
Love your recipes your family is so lucky to have such a good cook on hand to spoil them all the time.
Cheers
Helen
theUngourmet says
I love how ooey gooey and delicious these are! I’d love it with a nice scoop of vanilla bean ice cream too!
Now, if I could just get my son to eat his antioxidant rich apple skin we’d be good as gold! 😉
Anamaris says
BEAUTIFUL stuff! I StumbledUp on your site, I’ll be back.
Sarah at Candiquik says
Wow – I need a sample of one now! These look delicious. You can make them a bit “naughty” too (like the above comment) and serve w/ cinnamon ice cream or just whipped cream. Yum-my. Thanks for sharing.
Audrey at Barking Mad says
Yum! This would be perfect PERFECT on a chilly fall afternoon! Oh my gosh, I can just imagine how wonderful it smells!
Angela says
This recipe is a MUST! Just made it last night & it was delicious!
The Vicious Vegetarian says
I love baked apples and pears in many incarnations, never thought to do them thusly. Thanks for sharing, definitely giving this a shot ASAP.
Love the blog, can’t wait to try the wine!
Beth says
I tried this recipe on Sunday and it was divine! Thank you so much for posting it! 🙂 The only thing I did differently was use some sugar-free ingredients.
Nopalea says
Those look absolutely delicious! We just went apple picking yesterday and I was looking for something yummy to make. Thanks for the idea!
val says
These were incredibly delicious. A perfect Fall treat!
Toni says
My kids really loved these baked apples!
wilhelmina says
These baked apples are the perfect Fall treat! So cozy and comforting, and the sauce is to die for! Yum!
Cathy says
Yep, baked apples with sauce is definitely a fave!
Lindsay says
These baked apples with sauce were a big hit! I’ll definitely be making them again!
Cathy says
Yeah I can’t think of anything more delicious and easy to make than baked apples! Glad you enjoyed them.
Jane says
So so good..who knew baked apples were so amazing..but the sauce..OMG.
Cathy says
It really is yummy.