Hey everyone…remember back when I made the Easy Artisan Bacon-Cheese Bread? I know many of you tried it and loved the results. Well, I’m back with the same bread but with a new flavor, roasted garlic-rosemary. To. Die. For.
This bread is inspired by my absolute favorite bread baking books, Artisan Bread in 5 Minutes a Day and Healthy Bread in 5 Minutes a Day. These books have changed my life, I really mean that. I have learned to make amazing, homemade bread for my family almost daily. It’s so simple and the recipe has never failed. I have made my own adjustments that I think make the recipe work better and even make it even more foolproof.
Roasted garlic and rosemary is added to give an amazing flavor to an already awesome bread. I can’t wait for you try it!
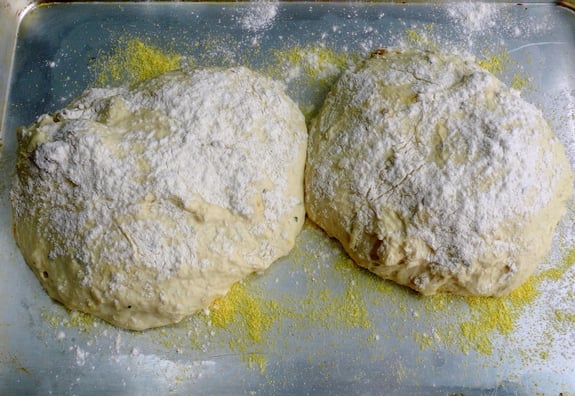
This recipe makes two loaves. And it’s okay if they kiss each other as they head into the oven.
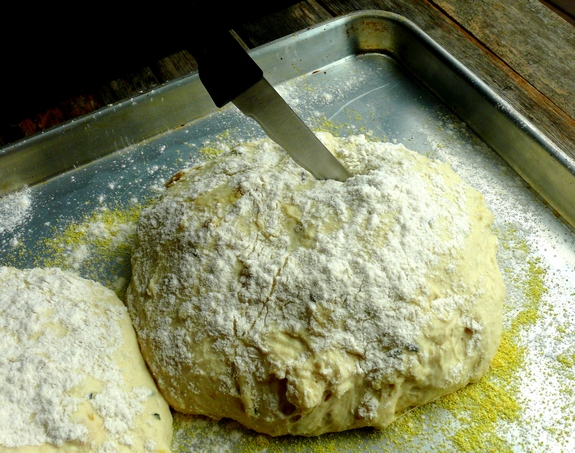
I cut an “X” shape or other design into each loaf so steam can escape while baking.
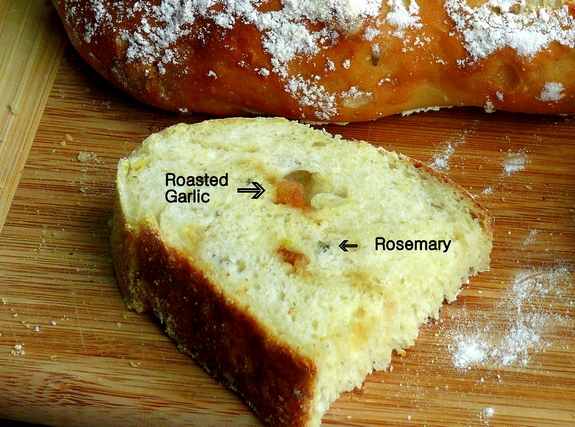
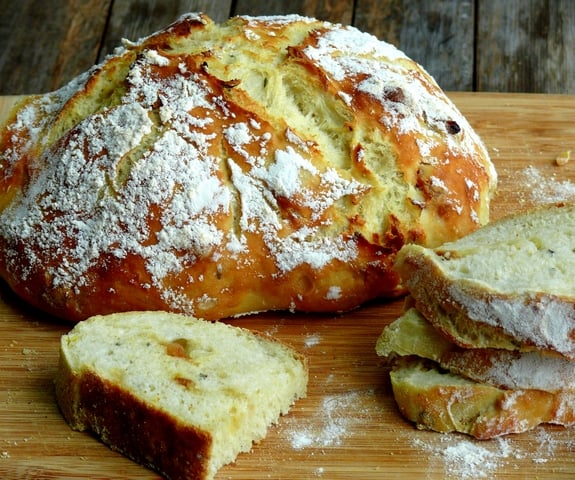
Each piece will have hunks of roasted garlic and flecks of rosemary…it should be against the law.
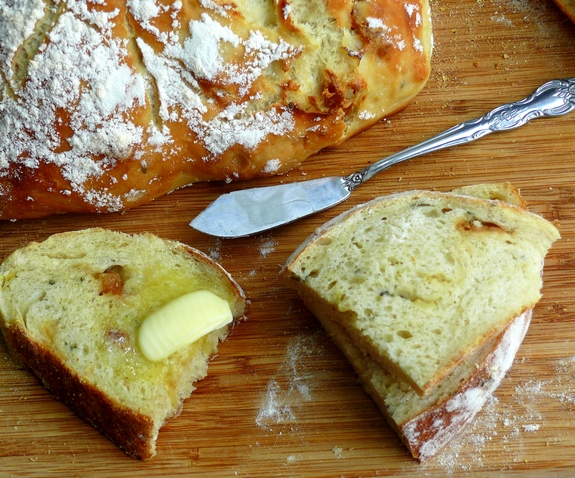
Wait until you have this with melted butter….you might melt yourself.
Easy-Artisan Roasted Garlic-Rosemary Bread
Ingredients
- 4 medium garlic bulbs
- olive oil
- 2 Tablespoons granulated yeast (active dry yeast)
- 3 cups warm water (about 105 degrees, so slightly above body temp)
- 5-1/2 cups (29.30 ounces) bread flour, more for dusting
- 1-1/2 Tablespoons kosher salt
- 2 Tablespoons chopped fresh rosemary
- 1 Tablespoon butter
- 1 Tablespoon yellow cornmeal
Directions
- Preheat oven to 450 degrees F. Peel away a couple of layers of the garlic bulb skin but make sure to leave the cloves intact and the bulb as a whole. Slice about 1/4" off the top of the bulb, exposing the cloves. Place all bulbs in aluminum foil, drizzling each head with olive oil. Cover completely with more foil. Place in oven on a baking tray for 45 minutes. When done, wait for garlic to cool. Use a fork to remove each clove or squeeze out with your hands. Set aside.
- Add yeast to your dough mixing/rising container. Pour in warm water and let the yeast sit for 5 minutes. Add flour, salt, roasted garlic and rosemary. Start mixing with a wooden spoon, use your hands as necessary to fully wet the mixture (the dough will be very wet and sticky). Cover dough with container top or plastic wrap and set in a warm place to rise for at least 3 hours. After 3 hours place dough in the refrigerator overnight. (This helps make the dough less sticky and easier to work with.)
- When ready to bake, place a metal baking pan (not glass) on the bottom rack of the oven. Fill it with water. (This helps steam the bread, giving it the nice crust.) Preheat oven to 450 degrees F, the water will heat up during the preheat. Meanwhile, butter the bottom of an 11 x 17 baking tray and sprinkle cornmeal over the butter to prevent the bread from sticking.
- Sprinkle the dough with flour and flour your hands as well. Divide the dough into two even loaves, shaping each into a ball. Place on the baking tray, several inches apart. Sprinkle generously with flour. (You can also bake one at a time, saving the dough in the refrigerator for another day.) Let rest on the baking tray for 20 minutes. Right before placing in the oven, score top of bread with an "x" or other decorative mark, cutting right through the dough.
- Bake for 30 minutes. Remove from oven and let cool 15-30 minutes before slicing.
- Buttering the bread once served REALLY brings out the garlic and rosemary flavor.
Two Years Ago: Spoonbread…You Can’t Live Without
Three Years Ago: PB & J Sundae
Four Years Ago: Corn and Salsa Tortilla Soup
