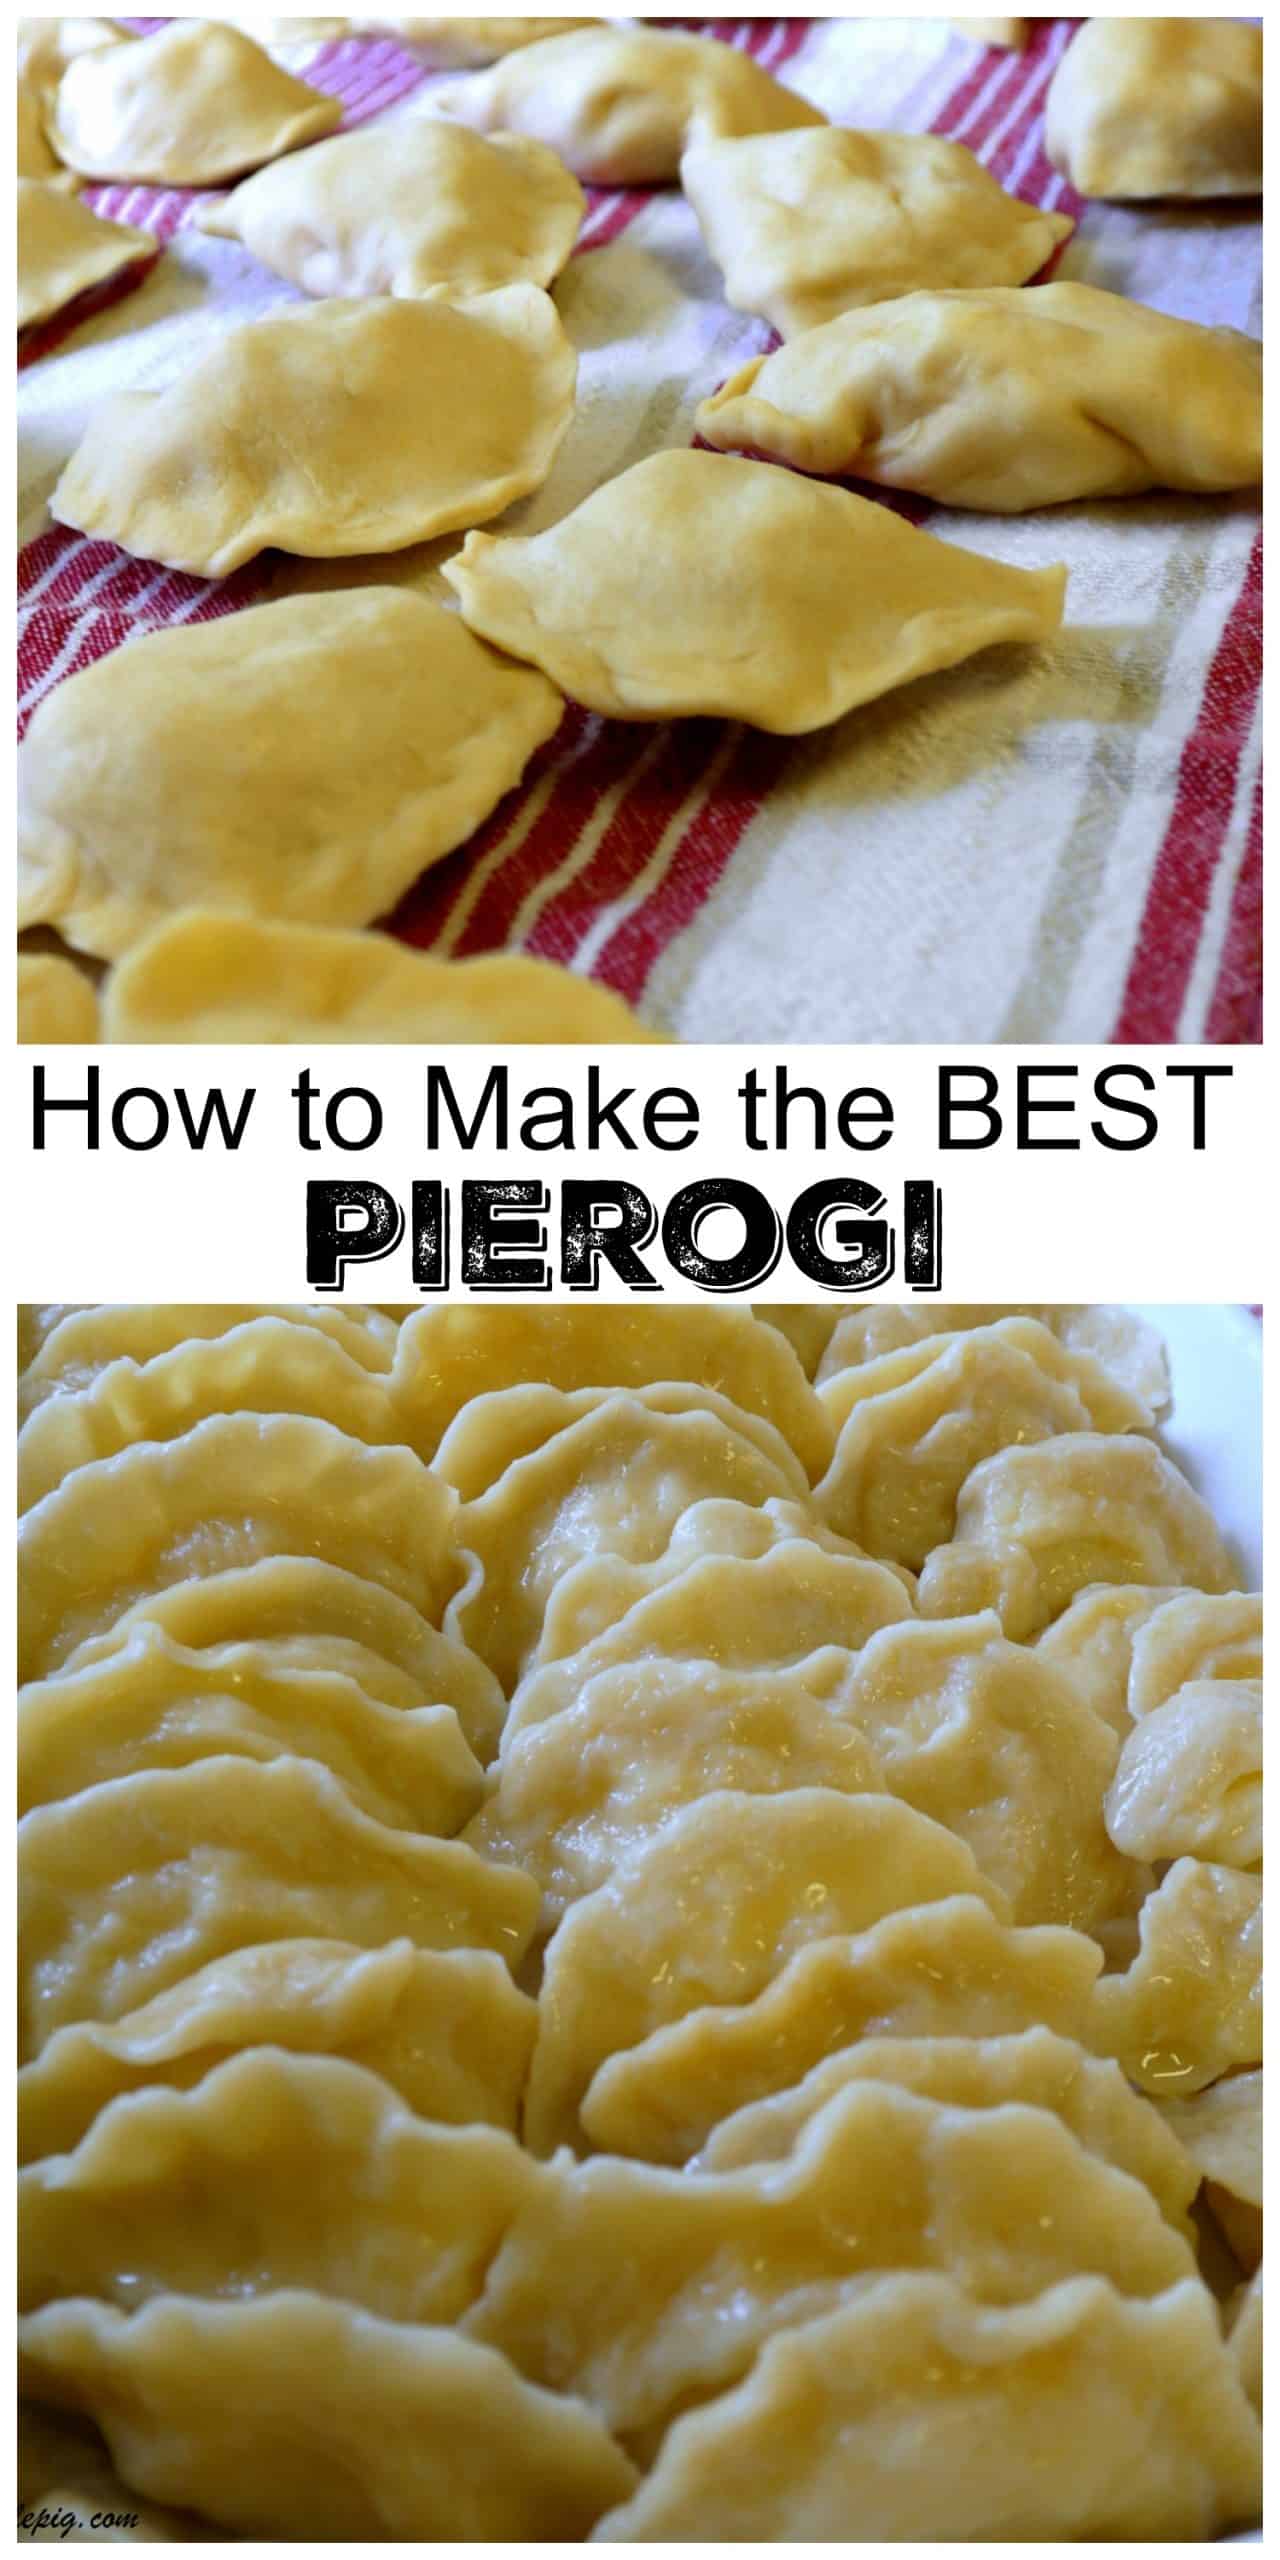
Crafting the ultimate Polish comfort food, homemade pierogi, is definitely a labor of love. From perfecting the dough to nailing the cheesy potato and onion filling, get ready to enjoy the authentic recipe that’s been a staple in my Polish family for years.

Polish Comfort Food
What are pierogi? Essentially, they’re the Polish version of filled dumplings, ours come smothered in butter, crispy-fried bacon, and sautéed onions, a real treat usually reserved for holidays.
In my family, when these hit the buffet line, you grab as many as you want because they vanish in minutes. If you’re lucky, they’ll reappear next year. As a second-generation Polish-American, I decided it was high time to master the art of pierogi making. Until now, I just relished eating them, but as the years pass, family traditions become crucial.
Being my mother’s only daughter, I’ve been named to carry on the pierogi-making legacy. Watching my grandmother and mother argue over flour proportions during the holidays was a sight, but somehow, they always worked it out. Learning this craft keeps alive a tradition that has shaped my family life.
Commercial pierogi are sad imitations of the homemade kind. Making them is no joke—it’s hard work and a day-long project. But make a lot; they freeze well, and you’ll regret not having more. For me, making pierogi was a commitment to the past while embracing the future. Amid life’s changes, pierogi-making has remained a constant, a reassuring thing in a world where time seems to slip away.
Pierogi Joke
Since we are pierogi-ing it up, I am reminded of a joke…
“There was a man lying upstairs in his bed, very close to death. He could smell the aroma coming from the downstairs kitchen where his wife was making pierogi. He couldn’t believe after 50 years of marriage she still loved him so much she would be making pierogi for what was most likely his final meal. He somehow got out of bed and crawled down the stairs to the kitchen. As he reached for the platter on the table filled with the freshly made pierogi, his wife slapped his hands away and said, ‘Hey, get away, those are for your funeral.’ Gasp.
How to Make Pierogi…Grandma’s Way…
There is a printable recipe with ingredients and all of the instructions at the end of this post.
I took the best pictures I possibly could. My mother is not used to someone snapping photos at every step of cooking. I didn’t even bother with auxiliary lighting, I think she would have had a few heart palpitations if I did. At one point I told her to stop working while I adjusted the white balance on my camera. Ummm, yeah, that didn’t happen. At all.

Among the myriad pierogi fillings, our top pick is a blend of potato, cheese, and onion. Here’s the catch—it has to be prepared a day in advance and needs to be ice-cold, no compromises. The quantity of pierogi you whip up hinges on the filling you prepare. We crafted around 70 pierogi and still found ourselves with some leftover filling.
Step 1 – Making the Filling
- For this many pierogi, peel and quarter 6 pounds of potatoes and bring to a boil.
- While the potatoes are cooking grate extra-sharp cheddar cheese (do not substitute) and sauté one large, chopped onion.
- When the potatoes can be easily pierced with a fork, drain and quickly return to the pot over the heat to remove any remaining water.
- Begin mashing with a potato masher, adding sautéed onion and cheese.
- Incorporate well and mash the potato mixture down hard until flattened.
- Let cool and place in the refrigerator overnight.

A single batch of dough yields approximately 22-23 pierogi, the exact count will be influenced by your cookie cutter’s size. I opted for a 3-1/4″ round cookie cutter, finding that this larger size simplifies the filling process, especially if you’re a novice.
Note: Attempting to double or triple this dough recipe isn’t advisable—it doesn’t yield the right results. We went with three distinct batches for our pierogi-making adventure. In other words, we made the dough recipe three times.
Step 2 – Making the Dough
- Take a medium-sized bowl, measure unbleached, all-purpose flour using the scoop and sweep method, and sprinkle table salt on top. Create a well, adding the egg and full-fat sour cream.

Step 3 – Blending the Dough
- Use two knives to blend the egg and sour cream into the flour.

Step 4 – Bringing the Dough Together
- Gradually introduce lukewarm water.
- Add only a small amount at a time while consistently cutting the egg into the flour. (My mom is quite particular and meticulous about this step—she proceeds slowly, ensuring every bit of flour is fully incorporated with the wet ingredients. So, take your time at this stage.)

Step 5 – Gathering the Dough
- After all the ingredients are combined, the dough won’t be overly smooth and might be somewhat sticky.
- Use your hands to gather it into a ball.

This is how it should appear once you’ve gathered the dough.

Step 6 – Resting the Dough
- Allow the dough to stand, covered with an inverted bowl, for about half an hour before use. (Don’t second-guess this step-the dough needs to rest.)

Step 7 – Cutting the Dough Circles
- After preparing all your dough batches, take either the entire dough ball or a portion and roll it out to a thickness of 1/16″. (If not using the whole ball, place the unused portion back under the bowl.)
- To prevent sticking, use flour on the rolling pin and work surface.
- The available workspace will determine how much you can roll out at once.
- The dough’s thickness is crucial for excellent pierogi, pay close attention.
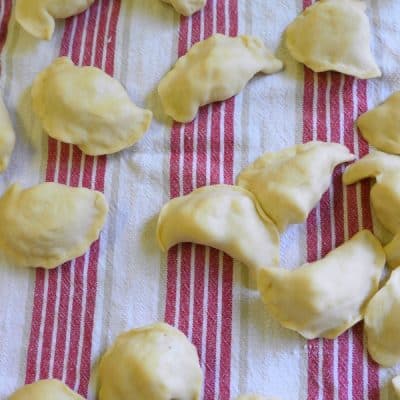
- Cut out circles as close to the dough edge as possible and place them on a clean dish towel, keeping them flat as you cut them out. In other words, avoid flipping them over.
- Any leftover dough scraps after cutting can be formed into a ball and set aside under a bowl for later use.

Tip: Keep the circles covered as they dry out easily.

Step 8 – Forming the Pierogi
- Retrieve only a portion of the filling from the large refrigerated bowl to keep it cold.
- Spoon about 2 tablespoons of filling onto each dough circle. To do this, pick up each circle, flipping it over into your hand—the edge on this side is better for sealing.
- Stretch the dough as you press in the filling with a spoon, adding more if needed.
- Bring the dough together and crimp the edges with your fingers. (Be cautious, as any filling on your fingers or on the edges where you’re sealing can prevent the dough from closing.)
- Also, avoid creating small holes or leaving any edges unsealed, as they will come apart during cooking.

Step 9 – Boiling the Pierogi
- Bring a large pot of water to a boil.
- Once boiling, place twelve pierogi at a time into the water.
- When they float to the top, give them an extra minute, then use a slotted spoon to remove, allowing excess water to drain off.
- Expect to lose a few that haven’t been sealed properly (early snacks). If it’s happening frequently, double-check and reseal your remaining pierogi before cooking.

Step 10 – Sautéing the Pierogi
Take them directly from the water and place them into a frying pan with a gob of melted butter over low heat. Here you are basically just coating them well with butter so they do not stick to each other. At this point you can cool them and freeze them in Ziplock bags if you like.
- Take the boiled pierogi directly from the water and transfer them to a frying pan with a generous amount of melted butter over low heat.
- The goal here is to coat them thoroughly with butter to prevent sticking.
- At this stage, you can let them cool and freeze them in Ziploc bags if you prefer.

Step 11 – Serving the Pierogi
- If you are going to serve them (not freeze them), line them up like soldiers in a 9 x 13 pan and keep them warm in the oven.

Step 12 – Making Pierogi Topping
- In a spacious frying pan, crisp up one pound of bacon until it’s just right.
- Remove the bacon, leaving some of the fat to sauté a large, chopped yellow onion.
- Once the onion is done, reintroduce the crispy bacon to the pan and give it all a good mix.

Step 13 – Serving and Reheating Pierogi
- Sprinkle the bacon-onion mixture generously over your pierogi and serve them warm.
- For reheating, place a dozen at a time in a large frying pan over low heat and cover. It’s essentially steaming, but it’s okay to make them a little crispy too.

Here they are with my Mom’s amazing sauerkraut in the background. Yum.

Making these are truly a labor of love and so worth it.
More Polish Food Recipes To Make
- Sauerkraut – Kapusta
- Polish Pickle Soup
- Babka
- Poppy Seed Roll – Makowiec
- Golabki _ Sweet and Sour Cabbage Rolls
- Sauerkraut and Kielbasa Nachos
- Rugelach
This post contains affiliate links. Please read my disclosure policy.
Pierogi
Ingredients
Pierogi Filling:
This amount of filling, fills approximately 70 pierogis, with some filling leftover.
- 6 lbs. russet potatoes, peeled and quartered
- 1 large yellow onion, chopped
- 3/4 cup extra sharp cheddar cheese (grate yourself, do not substitute)
Pierogi Dough:
Do not double this recipe. Each batch of dough makes approximately 22-23 pierogis. So repeat 3x for the amount of filling.
- 2-1/2 cups unbleached, all-purpose flour
- 1 tsp. table salt
- 1 large egg
- 3 tbsps. full-fat sour cream
- 3/4 cup lukewarm water
- butter
Pierogi Topping:
- 1 lbs. bacon, chopped
- 1 large yellow onion, chopped
- sour cream (optional)
Instructions
Pierogi Filling: (Make the day before, it needs to chill overnight.)
- Peel and quarter potatoes and bring to a boil in a large pot. While potatoes are cooking, grate cheese and sauté onion. When the potatoes can be easily pierced with a fork, drain and quickly return to the pot over the heat to remove any remaining water. Begin mashing with a potato masher, adding sautéed onion and cheese. Incorporate well and mash the potato mixture down into a hard-pack in a large bowl until flattened on the top. Let cool and place in the refrigerator overnight.6 lbs. russet potatoes, peeled and quartered, 1 large yellow onion, chopped, 3/4 cup extra sharp cheddar cheese (grate yourself, do not substitute)
Pierogi Dough:
- In a medium sized bowl, measure unbleached, all-purpose flour using the scoop and sweep method and sprinkle table salt on top. Make a well adding egg sour cream.2-1/2 cups unbleached, all-purpose flour, 1 tsp. table salt, 1 large egg, 3 tbsps. full-fat sour cream
- With two knives, incorporate the egg and sour cream into the flour. Slowly add in approximately lukewarm water. (Add only a small amount at a time as you continue to cut the egg into the flour.) (My Mom is very particular and meticulous about this step. She goes slowly and makes sure every bit of flour is incorporated with the wet ingredients, so take your time here.) Once all the ingredients have been mixed, the dough will not be very smooth and possibly quite sticky. Use your hands to bring it together into a ball. Let the dough stand covered with an inverted bowl for approximately 1/2 hour before using. (Don't skip this, the dough needs to rest.)3/4 cup lukewarm water
- Once you have made all your dough batches take either all of a dough ball, or a portion of the dough, and roll it out until it is 1/16" thick. (Using flour will help you keep the dough from sticking to the rolling pin and rolling surface. Your available work surface will obviously dictate how much you can roll out at any one time. Thickness of the dough is very important for good pierogi.) Cut out circles as close to the dough edge as possible and place them on a clean dish towel, placing them flat, just as you cut them out of the dough. In other words, do not flip them over. Keep the circles covered with a dish towel as they dry out easily. (Leftover dough scraps after cutter can be put together into a ball and placed under a bowl to use at the end.)
- Remove only some of the filling from the large bowl in the refrigerator so that you can keep it cold. Place about 2 Tablespoons of filling into the dough circle. Do this by picking up each circle and flipping it over into your hand. The edge on this side is better to seal. Place filling inside. (The dough stretches well as you press the filling in with a spoon.) Add more filling if necessary. Bring the dough together and crimp the edges with your fingers. (Be aware that if you have any filling on your fingers or on the edges of the dough, where you are trying to seal the edges, the dough will not close.) Also, be mindful not to make any small holes in the dough or leave any edges unsealed as they will come apart during cooking.
- Bring a large pot of water to a boil. Once water is boiling, place twelve pierogi at a time in the water. When they float to the surface, give them about one more minute and remove them from the water using a slotted spoon so the water can drain off. (It is common to lose a few at this point that have not been sealed properly (early snacks)). If it is happening a lot, reseal your other pierogi before dropping them into the water.
- Take them directly from the water and place them into a frying pan with a gob of melted butter over low heat. (Here you are basically just coating them well with butter so they do not stick to each other. (At this point you can cool them and freeze them in Ziploc bags if you like.)butter
- If you are going to serve them, I like to line them up like soldiers in a 9 x 13 pan and keep them warm in a 200 degree F. oven (covered).
Pierogi Topping:
- In a large frying pan, fry bacon until crispy, remove, leaving some of the fat to sauté onion. When the onion is done, add the crispy bacon back to the pan and mix together.1 lbs. bacon, chopped, 1 large yellow onion, chopped
- Sprinkle the bacon-onion mixture over your pierogi and serve warm.
- If you need to rewarm them the next day, place a dozen at a time in a large frying pan over low heat and cover. You are basically steaming them, but it's okay to make them a little crispy too. Serve with sour cream if you like.sour cream (optional)
Notes
Nutrition
As an Amazon Associate and member of other affiliate programs, I earn from qualifying purchases.
Paula says
I’m back … meant to say that I love the sauerkraut, too. Will we get that recipe, too? 🙂
melissa says
I don’t know if I’m up for making these. My husband is Polish American and I know if I tried to make these he’d say thats not how my mom and grandmother used to make them. Or he’d say they don’t taste the same. Maybe I’d get an A for effort though.
Thanks to you and your mom for showing us how its done, I might get brave during the holidays.
Laura says
I should learn by now never to come here unless I’ve eaten breakfast already.
Yum.
Mom24 says
These look wonderful, but intimidating! How about the sauerkraut recipe? Pretty please?
Eleanor Noernberg says
Use either a jar or bag of saurkraut, drain off water , put in saucepan add about a cup of fresh water, just enough to cover and add approximately 3 tbs brown sugar, mix. Cover and let cook till tender about half hour on medium. Drain and let cool. Then fill your dough and seal. Tip,make sure you drain off any remaining liquid or they won’t seal. Enjoy !
Eleanor Noernberg says
My Grandma’s dough was very simple and rich, 1 egg for every cup of flour and pinch of salt and a sprinkle or two of water as needed to form dough . Doesn’t need to be exact on measuring flour either. Don’t mix or knead dough too much , it will become tuff. Form ball , cover and let rest for half hour or so. Roll out and cut your circles.
Julia says
I love peroigis! I just made nudies last night, and have some extra dough — I bet the kale/ricotta would be a great filling! Do you think it’s sacrilege?
Fencepost says
Thanks for sharing this Cathy and Cathy’s Mom!
I will definitely have to try these.
Spinach Tiger says
I have always wanted to make my own perogi. Thanks for this. Loved the joke.
Jennifer says
Yum…
I think it’s so awesome that you are able to carry on this family tradition. I wish my family had something like that. Such a great story.
Mental P Mama says
Do you think your mom will come play at my house?
Julie says
They look amazing! How does mom make her sauerkraut??
Patricia Starr says
My grandma used to get can sauerkraut cut up
A whole onion sauté it in a stick of butter . Rinse and drain sauerkraut . Add in with the sautéed onion and dried cottage cheese. If you can’t find it I get a 16 oz container of large curd cottage cheese put in a strainer using paper towel try to squeeze off most of moisture. Let set for about and hour or so till a little dried out and add to the sauerkraut. Put in fridge to cool begire filling. . I love these better than potato and cheese
Ceil Rieker says
To Patricia Starr – Just a few comments. When I make sauerkraut, I do what you do and then I also add diced onion, mushrooms and caraway seeds. Also, use Farmer’s cheese, which is a dry white cheese, which would be easier then draining the cottage cheese. White this cheese, you would add sugar to taste plus, add a beaten egg, Mix it well and fill your dough. One more thing, you should salt the water when boiling the pierogi. Best of luck.
Linda Jackson says
You’re the first person who’s bushia (grandma) made pierogis with dried cottage cheese like mine did. But instead of sauerkraut we use shreadded cabbage sauteed with onion then mixed with the cottage cheese and chopped fresh parsley for the filling. It was a family tradition during Lent being Polish Catholic and fasting from meat on Fridays. But I’ve made them whenever I had the time, and my daughter has even mastered making them.
Cathy at Wives with Knives says
Wow, no wonder you spent so much time in the kitchen. Your pierogi are mouth watering. And I would love to try some of your mom’s sauerkraut. I love wonderful traditions like this.
Melynda says
What a great day you had working together, and the Pierogi look great. Yes I have tried the commercial variety and thought, who would eat this. But these are definitely a must try.
Candy says
Wow. Amazing! My husband loves them to death, but that looks like a lot of work. I’d have to quit my day job.
Laurie says
I love pierogi!!! I wrote a story about families who celebrated Wigilia every Christmas Eve with pierogis and have been meaning to make them ever since. Your recipe looks wonderful.
Marjie says
You can bring some to my house if you like.
Greg says
Cathy,
I once had a stellar pierogi dough recipe, but I can’t find it. Mama’s might just do the trick!
Greg
Ginny says
Delicious! They look so good!
dawn says
Oh how I love pierogi, I mean good pierogi cannot be found anywhere but home. I have had these at Polish weddings and they are fantastic. I really want to try making them.
Noble Pig says
Yes, the sauerkraut recipe will be forth coming as well.
Noble Pig says
I think the filling is up to interpretation and can be anything you like. I say try it.
Noble Pig says
Greg, this recipe works really well. My Mom has found that the recipes using larger amounts of flour and milk just don’t come together well. The key is the 2 cups to 2-1/2 cups of flour and not doubling the recipe. I think pierogi also weighs on your skills of rolling out a nice thin dough as well.
Lisa Sipple says
I love that you used a dishtowel with the colors of the Polish flag. Brilliant.
Paula says
I think I swooned when I read this. I actually read it twice because my eyes kept glazing over when I saw those photos … especially the one of the little pierogies lined up like soldiers. As if that wasn’t enough to get the drool glands pumping, seeing that magnificent bacon did the trick. I LOVE PIEROGI! Oh does this post take me back! I truly, truly love them and haven’t had them in ages. Oh, oh, oh these are sooo good at Polish weddings. Yours are amazing, and what a wonderful story they tell regarding your family. Love the joke. Love the pierogi. Yum, yum, yum!
Hilary says
These turned out absolutely amazing and I followed your instructions to the letter!
KathyB. says
This sounds very much like our family lefse making traditions. Some things just have to be made a certain way..and no questioning this!The pierogis sound delicious ( even though I hate potatoes)and the traditions behind the tasty things seem to be very sensible. What a true blessing for you to be able to document with photos and blog post a very important and delicious part of your family traditions.
Linda P says
Hi Kathy- My gramma immigrated from Prussia in 1904 and brought her recipe for pierogis with her. We always made three kinds of fillings during the holidays – potatoe/cheese, fried sauerkraut and prunes – and made a couple hundred of each!! Making my mouth water just thinking about them. Also served sour cream and cranberry sauce on the side. And pan-fried fish. Happy eating!
Mary says
I just made these today, and OMG!! They are deadly. I froze about thirty and my son and I will eat the rest over the next two days. It was totally worth the two day effort. Thanks for sharing. We love these.
The Duo Dishes says
Will you return to the 38 thing in the next post??? Let’s just all say that anything this traditional and homemade is so nice to see. We’d never be able to pull this off without some true dedication and commitment to the pierogi. ha!
Blond Duck says
That poor man in the joke!
Chuck says
Will you do Gulumpkis next please???
grace says
what a process! i’d say such a toiling task wouldn’t be worth it for such a little nosh, but who am i kidding? deeeelicious!
Marlene says
Oh my friggin Lord…I think I just died and went to heaven.
Katrina says
I’ve never had perogi’s before and while I don’t care for onions (Okay, I loathe them), everything else looks yummy. Hello, bacon! 😉
Danielle says
God Bless You for going through all of this! I don’t have the guts! I do buy fresh pierogi at a polish deli a few towns over but I am sure they don’t compare to these mouth watering beauties! I am so drooling! I am not Polish but my husband is. I was not fortunate enough to have met his mother, but when she was alive she and her sisters along with their mother used to make fresh Kielbasa in the basement of their home. Hubs has fond memories of this, but I don’t know that anyone in the family ever continued the tradition. Very Noble of you! I commend your effort and sense of tradition and family! Wish I was having those pierogi right now!
Kathy Maister says
Extraordinary post! Can I come to your house on Christmas Eve? I’ll bring the Cabbage Soup :)Cheers!
Lynda says
What a wonderful recipe and tradition and it’s great that you are going to carry it on! I have not eaten pierogi before, but now want to try making them, as my grandmother was polish and her family imigrated here in the late 1890’s. I would imagine they made these, but growing up, I only saw my grandmother about once a year,so, I’m sure some traditions have been lost. I do know she made the sauerkraut, though.Thanks for posting these delicious recipes and a wonderful story. Oh yea, thanks for the funny joke too, Cathy!
Bob says
oh… oh my. Those look so unbelievably good. I want them right now! I’ve never had homemade ones before, only store bought.
unconfidentialcook says
These just look amazing, and I’m so impressed you made them from scratch! I love them…but have not ventured beyond TJs own brand (which, btw, are pretty good).
elra says
So happy to have found this recipe, they turned out so good. Worth it!
Kimberly Ostrowski says
yes Cathy, my mouth is now watering. Can we consider my bday a holiday so your my will make them for me. 🙂
Savory Tv says
Beautiful. I typically shy away from recipes with lengthy instructions, but your post gives me confidence that the effort is absolutely worth it! Will report back with results!
leslie says
Ohh Cathy. I love love love pierogis.I am sad to say I settle for the frozen variety, because I have never thought to make them myself.My mom served these up to us all the time when we were young!I will be making these soon. Thanks for sharing your moms recipe
Maria in Oregon says
Wow! Those look yummy! Similar to Russian piroshki, only my family uses a meat filling. Cooked ground beef, sauteed onions, finly chopped hard boiled eggs, and lots of dill. The dough has yeast in it, and I use half butter and half lard. My mom also makes vegetarian ones for my dad, filled with mushrooms, onions and cabbage. She bakes hers, but there was a Russian deli in San Francisco that sold deep fried ones that were to die for!
Lisa says
Thank you for sharing this recipe! it is a wonderful story and also an education. My Mother-in-Law was Polish but I don’t remember her ever making Pierogi. She did make Galumpki,stuffed cabbage rolls, though and that is what my husband asks for. I love your reference to the battle over the amount of flour. It sounds like my aunts arguing over the recipe for the dumplings in my family’s Chicken and Dumplings. I do believe our food traditions are an important thread that binds us to the future as well as the past. Thanks again for sharing your family’s traditions with your readers.
dawn says
sweet charlotte Cath! Man oh man! you are evil today with all these food porn pics.I haven’t the patience for homemade pastas & periogi’s, but have it for pastries–go figure.But man oh man these look so good. What a treat!
Bellini Valli says
You have no idea how much I love delicious home made perogies. I am savouring every single photo and wishing I had some with sour cream, bacon and onions.
cheffresco says
We used to have perogies all the time growing up and I hated them!! But, they were never homemade & I must admit, I’d kind of like to try these 🙂
theungourmet says
This is quite a process but it looks to be so worth all of the effort. It’s terrific that you are carrying on this wonderful family recipe! Delicious!
Biz says
Wow, that’s a long process but totally worth it!
Um, the finished products looks AMAZING!
KarenDeborah says
Wow that is a healthy and wonderful dish!
I have to try this. Sounds delicious.
LilSis says
Oh my goodness! Those look amazing! Even more special since it’s a family recipe.
Liz C. says
Oh. My. Gawd. What a wonderful story (and joke) to go along with a treasured family recipe!!! Being the Potato-Ho that I am, I will be trying these very soon. However, I’m guessing that it’s going to take a few trying times to get it right.So, do you have a phone number to go with this recipe? You know. So I can call you when I screw it up… to find out where I screwed it up, LOL!
Kim says
My grandmother made these for holidays filled with peaches (yummy) and also cheese, she swore by farmers cheese. Sadly, she never got around to showing the grandchildren her methods. I made them once with my aunt but they weren’t as good. You are right it is an all day thing and it also helps to have at least 2-3 people working on them.
pigpigscorner says
These look absolutely mouth-watering! Yum with the bacon!
clumbsycookie says
I’m glad I reached your post after dinner, but still I feel like reaching for a couple. They look decadent and conforting!
Brian says
You know, I don’t live that far away and it looks like you made way too many for just your family to eat:)
Lisa says
Just discovered this website and what a great recipe to have found as my first one! I LOVE pierogi! My grandmother used to make them and several years ago three of us had an assembly line going all day making huge amounts of them. Our favorite fillings are the potato cheese and prune. I am book marking this site and saving the recipe to make for Christmas. Thank you so much!
Natasha - 5 Star Foodie says
These pierogi sound amazing made from scratch, especially good fried with bacon!
Caz says
Brings back memories of eating homemade ones in a part-Slovenian household! Mmm! IIRC, cottage cheese ones are good too. And when I was in a Ukrainian restaurant in Manhattan once, there were gourmet and seasonal pierogis that were shockingly good. (Sweet potatoes? Who knew?)My only problem now is that I was recently diagnosed with gluten intolerance. I wonder what would happen if I substituted gluten-free flour? Those photos just made me far too nostalgic (and hungry!)
Noble Pig says
Chuck- It will have to wait until my mother’s next visit…we just didn’t get around to making them.
ntsc says
Trying to remember the resturant in Cleveland that I had beef cheek pierogi.
One grandmother is Polish/Bohemian/other and used to make these.
Amy V. says
Love this timely post…in a week, my family is gathering for my grandpa’s 85th birthday. We will spend all day Friday preparing perogy, halupki, pagatch and other “Czech” foods that we grew up eating on special occasions! For me, it will be my first (and one of my only) opportunities to learn these from the hands that originally prepared them. My grandmother is no longer with us, but we are hoping to channel her spirit! Thanks for the post!
annbumbly says
One of my very favorite things. Never have had the pleasure of eating homemade ones.
Melynda says
Oh yeah, now I need to know how to make the sauerkraut. I love kraut.
TheKitchenWitch says
My hubs went to Penn State and the one thing he really misses from that area are those little pockets of potato goodness!
Lea Ann says
oh for pittysakes! This looks wonderful. I’m going to wait for one of our Colorado snowy days, one of those when you don’t want to leave the house and then I’m going to make these! In the meantime, does your mom want to adopt another daughter??? 🙂
megan says
These look awesome. I love the recipes of my youth. Your lucky you got to make them with your mom.
lo says
Oh, gosh — those pierogis are making my mouth water… what a great experience to learn to make these from your mom! If you don’t mind, I’ll be living vicariously… I don’t have an OUNCE of Polish blood, but pierogis are one of my favorite dishes.
Michelle at Find Your Balance says
Wow! In my family, it’s raviolis, but similar idea. We used to live in a very Polish town so my mom learned what pierogis were…but she’d buy ’em frozen and boil them. NOWHERE as yummy as those pictures you have here!
Flea says
Oh thank you! Thank you! My MIL makes pierogi that are to die for, but won’t pass on the recipe. Thank you! I know what I’ll be making for Christmas this year, along with the bigos and egg nog!
Tami Lyn says
I seriously just licked my moniter. No, really, I did. Apparently my daughter has had food on her fingers and touched the screen before me…..eew!
Audrey at Barking Mad says
Oiy! I don’t trust myself to make these on my own. So um, when are you coming to Maine? :-)~ I MUST have some.
RobinSue says
Love pierogis! Thanks for sharing the recipe and detailed instructions. So nice that you could spend this time with your mom cooking.
Ambroziak says
sharp cheddar, bacon, and not crispy!?! that’s different to me, but good!
Dagmar says
I laughed reading this post since we basically have a war each Christmas (or other rare occassions) as everyone tries to eat as many pierogis as possible. I was never allowed to help my mother doing them since she was too inpatient with me 🙂 She wanted them thin and perfect 🙂 So I didn’t do any until I was 30 years, with the help of my mum on the phone, and they are so worth the effort! In my family we prefer to stuff them with potatoes, quark and fried chopped onion. The name for them is Ruskie pierogi, which means Russian pierogis (but I don’t think there’s anything Russian with them). Your potato/cheddar/onion version looks great as well!
lisaiscooking says
I’ve never made pierogi, but now I really want to. One more cooking goal on the list.
Jamie says
I have so been craving pierogis lately! Honest! Now I really have to go and make them! Delish! And your mom’s sauerkraut looks fabulous!
Kristen says
OMG I’ve never had pierogis, made these and just wow!
Jess says
My grandmother makes them with dry cottage cheese mixed with egg whites and salt and pepper. Incredible! Are perogies not common in the U.S.? Up here in Canada they’re a staple! Usually we just boil them and eat them with sour cream, but I like to fry them until they’re golden and crispy and dip them in hot sauce! I made your version and love them even more!
Psychgrad says
I’ve had a few perogy marathons…I usually end up cursing my initial ambitiousness. 20 dozen sounds feasible until it’s 4 hours later and you’re still up to your elbows in potatoes and dough.I haven’t had much luck with freezing after putting butter on the perogies — they stuck together. So, I just flash freeze them. Made your version and they were so good!
will says
Love pierogis and these were fantastic!! Made them last night and even my picky boys aged 9 and 6 loved them. Have to say i struggled with the dough a bit and properly filling it and sealing it. Think I just need a bit mor preactice which is sue to happen soon!!!!!
Whitney Donohue says
Your pierogis are almost exactly like ours–except the filling. But I rarely see them boiled and then cooked in butter. Yummmm… Our traditional filling is a basic cottage cheese filling. Add an egg and some salt and pepper. Hmmm..I think I’m going to have to make some. Also, our pierogies end up as squares. If you cut the rectangles out of the dough, you don’t have to work it so much. Much easier! (I do biscuits the same way). Thank you for sharing! We made your version and they are amazing!
Kevin Lewandowski says
Thank you so much for this recipe.My mom didn’t make combination fillings but we always had a few different fillings:potato, cabbage, dry cottage cheese, and prune(Lekvar Prune Putter)were the usuals.She also slightly browned them instead of coating with melted butter.No matter how they are filled or butter coated or browned, I have eaten two dozen at a time before.I’m going to have to save this recipe.I just found one for halushki and I’m looking for pagatch and several other unnamed foods mom used to make.
melissa says
hi cathy, found you by accident while researching pierogis in oregon..you mentioned a town neat mcminville that sells them..who and where please ? i’d love homemade but will settle for commercial as long as they are not those horrible frozen mrs.t’s..how vile.. i have made them in the past and my favorite is the chheeeeese..have you a filling recipe for those..your blog is so cool..melissa szilagyi
Noble Pig says
Hi Melissa-I live in McMinnville but I don’t know where to buy pierogi’s here, I just make them. I don’t usually make the cheese filled one’s either, sorry! Thanks for dropping by.
Dawn says
We always make our pierogi with a meat filling…I’m going to have to give this filling a try! 🙂
Marcy Able says
LMAO Cathy, I had heard that pierogi joke, and I remember my grandmother making them too.
I need to learn how to make the bohemian dumplings my grandmother and mother made before there is no time left:)
Elizabeth says
2 and 1/2 cups of King Arthur unbleached flour = 300 grams.
This might be helpful to those who do not like to have problems with making dough. The scoop and sweep method was always hard for me because some of my scoops were heavy and some light. I learned to use scale for my flour.
You can start with 300 grams of flour and then always add a bit more flour or a few more drops of water.
The most popular pierogi in Poland are called “Ruskie” and the filling is made of mashed potatoes, sautéed onion and crumbled white farmer cheese, called Twarog. I find this farmer’s cheese in my local Meijer’s food store.
Now that I can made good pierogi dough, I love making all kinds of stuffed dumplings. This recipe with cheddar cheese sounds great. I will try the dough and the filling. In Poland, the bacon and onion “sauce” is called “omasta.” There are other omastas too, but they all involve some kind of fat. This one sounds great.
Making pierogi is almost a dying art now. Kudos to you and your mom, Cathy!
Helen says
I make them every Christmas time with my son and daughter-in-law. We have the assembly line going. He uses the Kitchen Aid rollers to roll out the dough in strips then I cut and fill and my daughter in law cooks. I want to try this recipe for the dough just to make a small batch. I wonder how many potatoes you would use for just one batch of this great sounding dough.
Tom says
I remember my Grandmother making pierogi at her coal-fired stove in PA. With a cigarette hanging out of the corner of her mouth. I’ve never seen anybody cut, fill, crimp as fast as she did. Of course, with 13 kids, she had to be fast. Pierogi was made from things grown on the farm: wheat flour, eggs, butter, sour cream, potatoes, cheese, onions, prunes. Pierogi with sour cream, onions and fried cabbage was a good meal back in the day. I need to try to make them.
Tom
(just down the road in Philomath)
Mx says
Great Post! My sister and I are laughing as I read this out loud. We learned from our Polish/Ukrainian Grandma…and I confess we’re Pierogi snobs- no store bought will do! But I once carried around a church referral for 8 years (that I got at a garage sale on the west coast) until a visit coincided with the church pierogi sale. I set my alarm for 6AM to call in my order because I was advised they sell out fast, then drove 45 minutes. It still took less time than making them. They were yummy- but truth is no-one will ever make them as good as your Grandma, Mom or Aunts.
Our version of Sauerkraut: cook the sauerkraut in water (large jar or package) then lightly wring it (still tangy) and drain/cool; in a skillet sauté a couple chopped onions in 1/2 cup butter then add about a dozen eggs, scramble then break eggs into tiny pieces with fork; add the sauerkraut and mix thoroughly. Salt and Pepper to taste. Don’t worry about making too much because a lot of it lands in your mouth before it ever makes it to the pierogi. Don’t use too much butter or it causes crimping difficulties.
Our making is a Christmas tradition.. But as I sit here, visiting my family, I’m finishing off the last of what we bought from our favorite church. Thanks for your wonderful post!
Cathy says
Love this!
Chelsea says
Hi there!!! I am about to try this recipe and I was curious if I could prep them all now (11am) and then boil them at dinner for when my husband is home? Or is it best to make them and boil them asap 🙂 thanks so much!! 😍 I cannot wait to try these..I have the filling made since yesterday.
Cathy says
They can absolutely be made ahead.
Shay says
I love this recipe, have made it several times and always turns out perfect. Love the filling and the dough.
Susie says
I was nervous about trying this pierogi recipe, but it was so easy to make. We loved them. The sour cream in the dough made it so moist and delicious. This is a keeper.
Cathy says
So happy to hear that!
Erika says
I wanted to recreate my grandma’s pierogi and found this recipe to try. It was a labor of love, but brought back so many great memories. Turned out perfect.
Cathy says
So glad!
Libby says
I have to say all of the steps to make homemade pierogi is totally worth it. I had only tried the frozen ones in the past but these were so much better. My kids loved them and this recipe is a keeper.
wilhelmina says
This is the ultimate comfort food for me! I really enjoyed these pierogi!
Cathy says
Yay!
Evelyn says
Made these today with my grandson for his homework project, Very delicious, made some caramelized onions for topping omgoodness so yummy, Don’t think I could of made them without him,gotta have a good back,something don’t have any more, So lots of credit for all the women that make these,Bless you
Julie says
Wow, these were amazing! I was going for a thicker dough and this was perfect! It took me about five hours with a little help from my mom in the last stage. Next year, I will do 5 pounds of Yukon potatoes since they are creamier and easier to mash. I’m going to add more salt to taste to the filling and a whole block of cheese.